
BakeryDiary is a recipe curation and editorial platform. We research and curate recipes from public sources, considering ratings, reviews, comments, and feedback. We then refine and present them clearly for home cooks. We are committed to an ad-free, focused experience that makes discovering and preparing recipes easier.

This simple white cob loaf is a wonderfully approachable way to bake a classic homemade bread without needing a loaf tin.
The dough is shaped entirely by hand, making it an especially useful recipe for beginners who want to learn the basics of bread-making while still achieving a beautiful, rustic result.
Made with strong white flour, instant dry yeast, salt, lukewarm water, and softened butter, the ingredient list is short and straightforward, yet the finished loaf has plenty of character.
The bread develops a firm, golden crust while the inside remains soft and tender, creating a satisfying contrast in every slice.
The small amount of butter adds richness to the dough without overpowering its simple wheat flavor.
During baking, steam from a tray of boiling water helps create the loaf’s lovely crust, giving the finished cob a traditional bakery-style appearance.
Shaping the dough is an important part of the recipe. Folding and tightening the dough repeatedly builds surface tension, helping the loaf maintain its rounded cob shape as it rises and bakes.
After proving until doubled in size, the loaf is lightly floured, scored across the top, and baked until the base sounds hollow when tapped.
With around 10 thick slices from one loaf, this versatile bread is ideal for snacks, sandwiches, toast, or simply serving warm with butter.
Its uncomplicated ingredients and hands-on method make it a rewarding first bread recipe for home bakers.
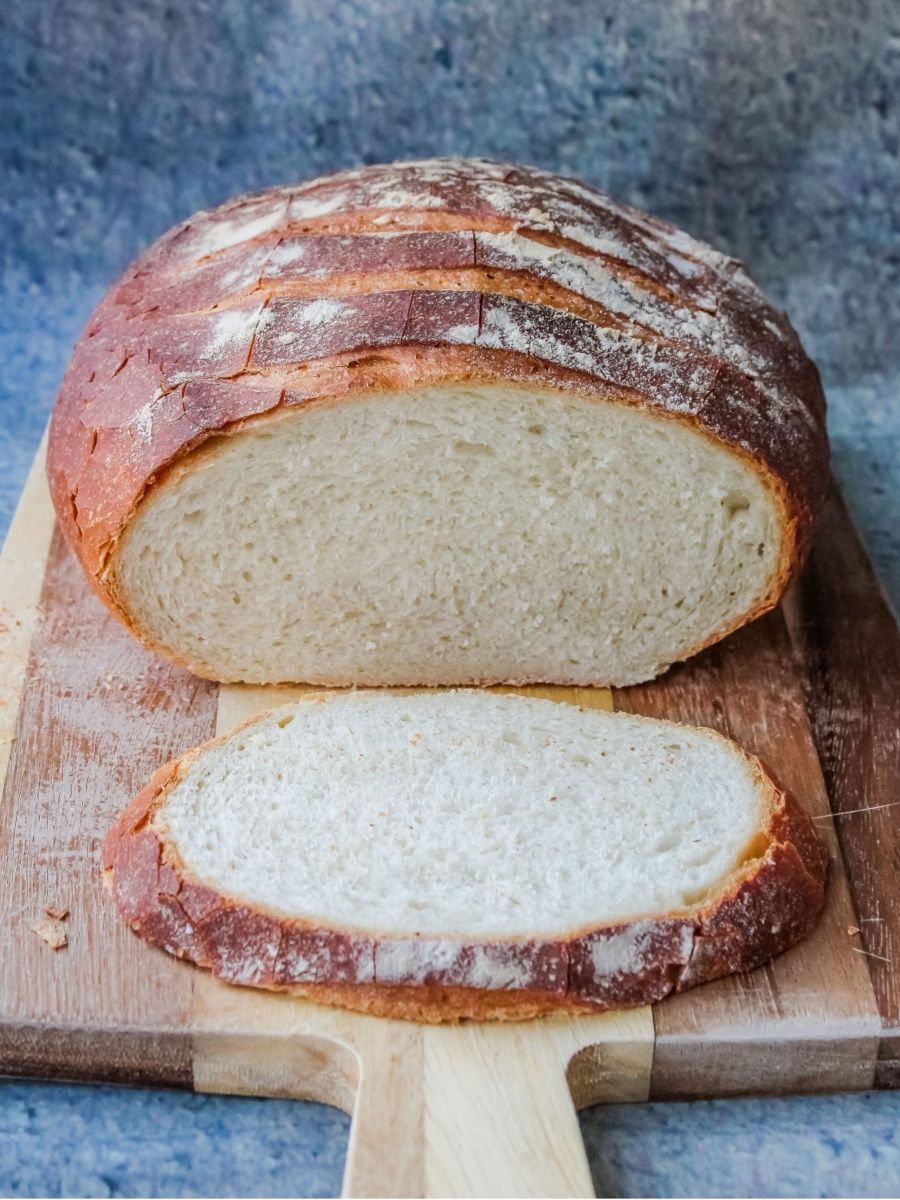

Simple Bakery-Style White Cob Loaf
Ingredients
Equipment
Method
- Combine the Dry Ingredients and Butter: Add the strong white flour to a large bowl. Add the softened butter, then place the instant dry yeast and salt on separate sides of the bowl so the salt does not slow or kill the yeast. Gently mix everything together with your hand until just combined.
- Add the Water and Form the Dough: Pour approximately two-thirds of the lukewarm water into the bowl and continue mixing by hand. Gradually add more water, mixing between additions, until the dough is smooth but not soggy. You may not need all 290 ml, or you may need a little more. If too much water is added and the dough becomes soggy, sprinkle in a little extra flour until the correct consistency is reached.
- Knead the Dough: Lightly pour and spread olive oil over a clean work surface and place the dough on top. Knead for approximately 10–12 minutes, using the oiled surface rather than flour so additional flour does not affect the dough's consistency. Continue until the dough develops a smooth outer skin.
- First Rise: Lightly oil the large bowl and return the kneaded dough to it. Cover with a clean cloth or cling film and place in a warm location for 1–2 hours, until it has at least doubled in size.
- Deflate the Dough: Lightly flour a work surface and gently tip the risen dough onto it. Gently punch the dough to release the trapped air.
- Begin Shaping the Cob: Take one edge of the dough, pull it across toward the opposite side, and press it down to seal it into the dough.
- Build Surface Tension: Turn the dough slightly and repeat the pulling and sealing process several times. Continue turning slightly between each fold. As the dough becomes tighter and firmer, you will gradually be able to pull less dough across; this builds the tension needed to help the loaf maintain its round shape without spreading.
- Tighten the Loaf: Turn the dough over so the folded seams are underneath, leaving a smooth-skinned round of dough on top. Cup your hands around both sides, tucking them slightly underneath the dough. Turn the dough clockwise or anti-clockwise while repeatedly lifting it slightly and tucking your hands underneath to pull the dough inward and tighten the outer skin.
- Complete the Cob Shape: Continue tightening the dough until it feels firm and holds its rounded shape. Place it on a silicone baking tray or a baking tray lined with baking paper.
- Second Rise: Cover the shaped loaf gently with a cloth or a loose piece of cling film. Leave it to rise on the baking tray for approximately 1 hour, until it has risen to around double its original size.
- Preheat the Oven: Preheat the oven to 230°C/210°C fan. Place an empty roasting tray on the lowest shelf or base of the oven while it preheats.
- Score the Loaf: Once the dough has completed its second rise, remove the cling film if using it. Lightly dust the top with flour, then use a sharp knife to make several incisions across the surface.
- Create Steam: Carefully add boiling water to the empty, preheated roasting tray in the oven. Work quickly to avoid losing too much heat; the steam will help create a lovely crust.
- Bake the Bread: Place the loaf on the middle shelf of the oven and bake for approximately 30 minutes. Check for doneness by carefully turning the loaf over and tapping the base; it should sound hollow when fully baked.
- Cool and Store: Transfer the baked loaf to a wire cooling rack and allow it to cool completely. Keep the bread well covered in a cool place and enjoy it within three days.
Notes
- Use tepid or lukewarm water rather than hot water when mixing the dough.
- Keep the yeast and salt on separate sides of the bowl initially so the salt does not interfere with the yeast.
- The dough should be smooth but not soggy. Add the water gradually because you may not need the full 290 ml.
- Kneading for the full 10–12 minutes helps develop the smooth outer surface needed for shaping.
- During the first proof, the dough should become at least twice its original size before shaping.
- Take care when shaping the cob to build enough tension in the dough so it can hold its round form rather than spreading.
- The second rise should also bring the shaped loaf to roughly double its size.
- The preheated roasting tray and boiling water create steam, which helps produce the loaf’s characteristic crust.
- Check doneness by carefully tapping the base of the baked loaf; a hollow sound indicates it is ready.
- Keep the finished bread well covered in a cool place and aim to eat it within three days.
Chef’s Secret
The key to keeping this hand-shaped cob beautifully round is to focus on surface tension during shaping.
Each time you stretch an edge across the dough and seal it underneath, rotate the dough slightly and repeat.
Once the folds are underneath, continue rotating the dough while gently tucking the underside inward with cupped hands.
This gradually tightens the outer skin, giving the dough enough structure to maintain its rounded shape during the final rise and baking.
Serving Suggestions
Serve this rustic white cob in thick slices while it is completely cooled, with butter for a simple snack.
It also works well as everyday sandwich bread or toasted and topped with your favorite spreads.
For a more substantial serving, pair slices with soup or a savory meal, using the crusty bread for dipping.
The rounded loaf also makes an attractive centerpiece for a casual breakfast, afternoon snack, or sharing platter.
Conclusion
This simple white cob loaf is a rewarding introduction to homemade bread, requiring no loaf tin and only a handful of basic ingredients.
With careful kneading, proper proving, and patient hand-shaping, you can create a beautifully rounded loaf with a crisp crust and soft, tender interior.
The straightforward method makes it approachable for beginners while still producing a satisfying, traditional-looking homemade bread that is versatile enough for everyday eating.
