
BakeryDiary is a recipe curation and editorial platform. We research and curate recipes from public sources, considering ratings, reviews, comments, and feedback. We then refine and present them clearly for home cooks. We are committed to an ad-free, focused experience that makes discovering and preparing recipes easier.
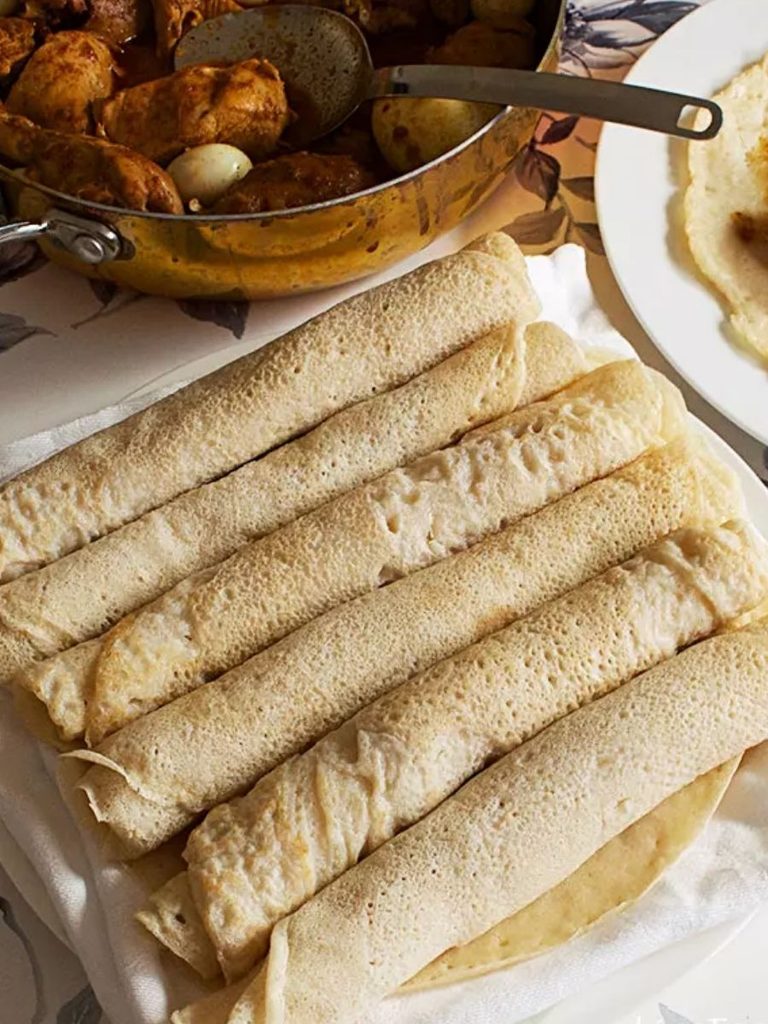
Injera is a distinctive Ethiopian flatbread known for its soft, spongy texture, gently sour flavor, and wonderfully porous surface.
Made primarily from teff flour, this traditional bread develops its characteristic tang through fermentation, creating a flavor profile that is pleasantly sharp yet earthy.
The tiny holes that appear across the surface give injera its signature appearance while also making it especially effective at soaking up sauces, gravies, and flavorful stews.
This recipe combines teff flour with rice flour and follows a traditional fermentation process.
A simple starter is prepared first, then incorporated into the main batter, which rests for several days to develop its sour character.
The fermented batter is partially cooked into a thick mixture called absit before being blended back into the batter.
This additional step helps create the soft, airy structure associated with properly prepared injera.
Once the batter is ready, it is poured in a circular motion onto a hot non-stick pan, forming a large, thin round.
As it cooks, bubbles and holes begin appearing across the surface. Covering the pan allows the injera to finish cooking gently until the edges curl and the bread becomes soft and flexible rather than crisp.
For those who want a faster option, the recipe also includes a quick version using active dry yeast and a shorter resting period.
Whether you choose the traditional fermented method or the quicker approach, the result is a versatile Ethiopian flatbread designed to complement richly seasoned foods while bringing its own pleasantly tangy, spongy character to the meal.
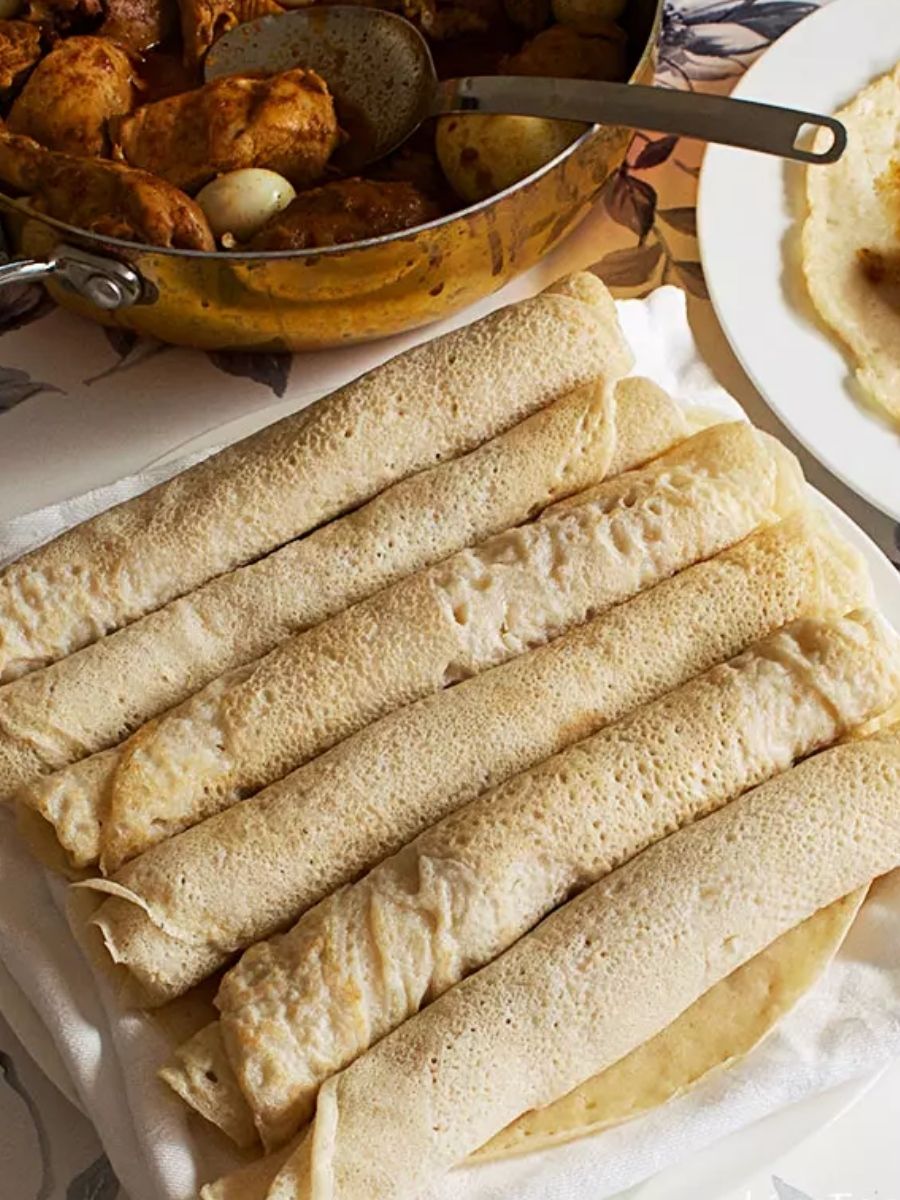

Homemade Ethiopian Injera Bread
Ingredients
Equipment
Method
- Prepare the Starter: Combine the teff flour, rice flour, active dry yeast, white sugar, and water in a large ceramic bowl. Mix thoroughly until evenly combined.
- Rest the Starter: Cover the bowl with kitchen paper and place it somewhere warm for 2 hours so the starter can rise. During cold weather, the oven light can be switched on and the covered starter placed inside, but do not turn the oven on. An airing cupboard can also be used as a warm location.
- Combine the Fermented Batter: Place the teff flour and rice flour in a large bowl. Add 70 g, or about ½ cup, of the prepared starter.
- Build the Thick Batter: Gradually mix in 250 ml, or 1 cup, of the tepid water using a wooden spoon. Continue adding the remaining water a little at a time until you have a very thick batter that resists the spoon.
- Ferment the Batter: Cover the bowl with kitchen paper or loosely cover it with a lid. Leave the batter on the kitchen counter for 2–3 days so it can ferment. In a warm climate, 2 days may be enough; in cooler conditions, it may require the full 3 days, and sometimes up to 4 days. Begin checking after 1 day if the batter is kept somewhere warm. The batter is ready for the next stage when a clear liquid layer has formed on top and bubbles are beginning to appear. A sour aroma similar to sourdough is also expected at this stage.
- Drain the Surface Liquid: Once the fermented batter has reached the correct stage, pour off the liquid that has collected on top.
- Boil the Water: Place 250 ml, or 1 cup, of water in a small saucepan and bring it to a boil over high heat.
- Cook the Absit: Add 80 ml, or ⅓ cup, of the fermented injera batter to the boiling water while stirring continuously. Keep stirring until the mixture becomes a thick, porridge-like batter.
- Cool the Absit: Remove the saucepan from the heat. Transfer the cooked absit to a bowl and allow it to cool to almost room temperature, which takes about 1 hour.
- Blend the Batter: Once the absit has cooled, place portions of the original fermented batter together with portions of the absit into a blender. Work in 2–3 batches and blend until smooth.
- Rest the Blended Batter: Return the blended mixture to the original fermentation container. Cover it loosely and leave it for another 1–2 hours, until plenty of bubbles have developed. If kept somewhere warm, this stage may be faster; otherwise, it can take considerably longer, potentially around 6 hours. The bubbles are an important indication that the batter is ready.
- Thin and Season the Batter: When the batter is bubbly, stir in 250 ml, or 1 cup, of lukewarm water together with 1 tsp salt. Mix thoroughly.
- Check the Consistency: Aim for a pancake-batter consistency. When you dip your fingers into the batter, it should run off while leaving a thin coating behind, similar to warm custard.
- Heat the Pan: Use a non-stick electric griddle if available. Otherwise, use a large non-stick flat griddle, frying pan, or Indian tawa. Heat the pan over medium-high heat.
- Transfer the Batter: Pour the prepared injera batter into a jug so it is easier to pour evenly.
- Pour the Injera: Once the pan is hot, begin at the outside edge and pour the batter from a height of about 6 inches, moving in a circular motion until the pan is completely covered. If necessary, tilt the pan quickly to fill any uncovered areas, although keeping the pan level is preferable.
- Watch for Air Pockets: After about 30 seconds, air pockets or holes should begin appearing across the surface.
- Cover and Cook: Cover the pan with a lid and continue cooking for 1–2 minutes, until the edge of the injera begins curling upward and the sizzling sound has reduced considerably. Thinner injera may be ready after about 1 minute, while thicker pieces may require 2–3 minutes.
- Remove the Injera: Use a large, wide spatula to gently lift an edge and slide the cooked injera onto a plate.
- Check the First Injera: Turn off the heat and examine the first injera. Use its texture to determine whether the remaining batter needs adjustment.
- Correct a Soft or Sticky Batter: If the injera is too soft, sticky, or has become a lump in the pan, transfer a small amount of batter to a blender. Add 40 g, or ¼ cup, rice flour and blend until smooth. Stir this mixture thoroughly back into the remaining batter.
- Correct a Thick Batter: If the injera is too thick or dry, stir in approximately 2–4 Tbsp water to make the batter slightly thinner.
- Cook the Remaining Injera: Continue cooking the remaining batter in the same manner, stacking each finished injera on top of the previous one on the plate.
- Reserve a Starter: If desired, reserve ½ cup of the batter as a starter for the next batch. Store it in the refrigerator for up to 1 week.
- Cool and Rest: Allow the cooked injera to cool to room temperature. Cover with cling film and let it sit for 1 hour before serving. The longer it rests, the softer and more flavorful it becomes; leaving it for a day is ideal and allows it to be prepared ahead of time.
- Freeze for Longer Storage: The finished injera can be frozen for up to 3 months.
- Activate the Yeast: Place the dry active yeast in a large bowl with a small amount of the warm water. Stir to combine.
- Add the Flours: Add the teff flour, your choice of plain flour or rice flour, and the salt.
- Make the Batter: Gradually add more warm water while stirring with a wooden spoon. Continue until you have a smooth batter with the consistency of thick pancake batter. You may not need to use the entire amount of water.
- Rest the Batter: Cover the bowl with cling film and leave the batter to stand for 1 hour.
- Add the Hot Water: After 1 hour, stir the batter. Gradually pour in the 125 ml very hot water, just off the boil, while stirring continuously. Continue stirring until the mixture reaches the thick crêpe-batter consistency used in the traditional method.
- Rest Again: Leave the batter to stand for 20 minutes.
- Cook the Quick Injera: Proceed with the same pan-heating, circular pouring, covering, cooking, and removal method described for the traditional injera.
Notes
- The traditional method requires several stages and 2–3 days of fermentation, so plan ahead before you begin.
- A warm environment can speed up fermentation. In cooler conditions, the batter may need up to 4 days.
- Look for a clear liquid layer, bubbles, and a sour aroma before moving on to the absit stage.
- The final batter should resemble pancake batter and should leave only a thin coating on your fingers.
- The first injera is useful for checking the batter consistency. Adjust the remaining batter if it is too soft, sticky, thick, or dry.
- Keep the pan level while pouring whenever possible. Pour the batter in a circular motion, beginning around the outside.
- The characteristic holes should begin appearing after about 30 seconds of cooking.
- Cooked injera can be prepared ahead. Allow it to cool before covering and resting.
- A portion of batter can be reserved as a future starter and refrigerated for up to 1 week.
- Finished injera can be frozen for up to 3 months.
- The nutrition information provided in the source is based on traditional injera and does not include cooking fat.
Chef’s Secret
The most important consistency check happens just before cooking.
After the fermented batter has been blended with the absit, lukewarm water, and salt, test a little batter between your fingers.
It should flow away easily while leaving behind a thin coating, similar to warm custard.
This balance is especially useful because the first injera acts as a practical test.
If it turns out too soft, sticky, or lumpy, blend a portion with 40 g rice flour and mix it back into the remaining batter.
If it is too thick or dry, add a small amount of water, starting within the suggested 2–4 tablespoon range.
Making this adjustment after the first piece helps you improve the remaining batch without changing the traditional fermentation process.
Serving Suggestions
Serve injera as a soft, flexible base for richly flavored Ethiopian dishes, allowing its porous surface to soak up sauces and stews.
It can be arranged on a large serving plate with the accompanying foods placed over or alongside it, making the bread both part of the meal and an easy way to scoop up flavorful bites.
Because the finished injera becomes softer and more flavorful as it rests, preparing it ahead can be especially convenient when serving a meal to guests.
For a simple presentation, stack the cooked rounds neatly and serve them at room temperature or after their resting period.
Conclusion
This Ethiopian injera recipe offers both a traditional fermented method and a quicker yeast-based alternative, making it possible to choose between deeper fermentation or a shorter preparation.
The traditional process develops the characteristic sour aroma and flavor, while the absit and blending stages help create the signature bubbly, spongy texture.
Once cooked, the soft, porous flatbread is ready to complement flavorful dishes and absorb their sauces beautifully.
With careful attention to fermentation, batter consistency, and the first test injera, you can create a homemade flatbread that captures the distinctive character of classic Ethiopian injera.
