
BakeryDiary is a recipe curation and editorial platform. We research and curate recipes from public sources, considering ratings, reviews, comments, and feedback. We then refine and present them clearly for home cooks. We are committed to an ad-free, focused experience that makes discovering and preparing recipes easier.
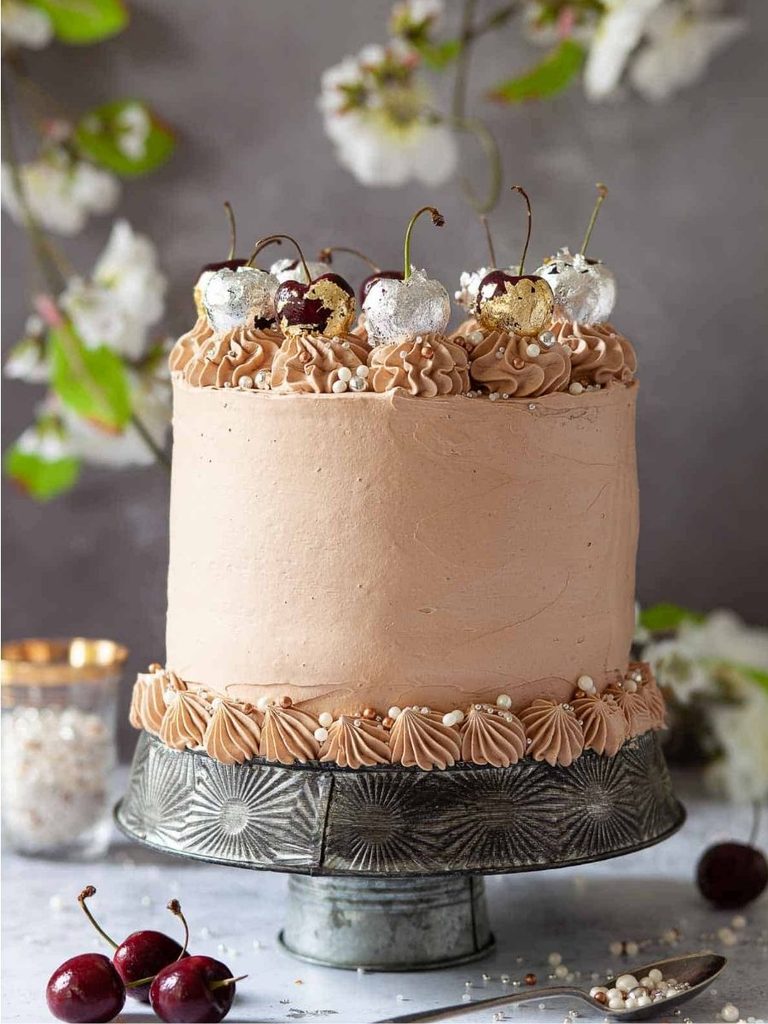
A Chocolate Cherry Cake is a stunning dessert that brings together rich chocolate flavor, sweet cherries, and silky buttercream in an elegant three-layer creation.
With its deep cocoa sponge, homemade cherry jam, and smooth Italian buttercream, this cake is ideal for birthdays, anniversaries, festive gatherings, or any occasion that deserves a memorable centerpiece.
Each sponge layer has a light, tender texture, enriched with butter, cocoa powder, and a hint of espresso powder that deepens the chocolate flavor without overpowering the cherries.
Separating the eggs and gently folding in the whipped whites helps create an airy cake with a delicate crumb.
Between the layers, homemade cherry jam adds fruity sweetness and a pleasant tartness, balanced by the creamy vanilla Italian buttercream.
The outside is covered in luscious chocolate Italian buttercream, giving the cake a smooth, indulgent finish.
Dark chocolate adds depth, while vanilla brings warmth and a subtle sweetness to the frosting.
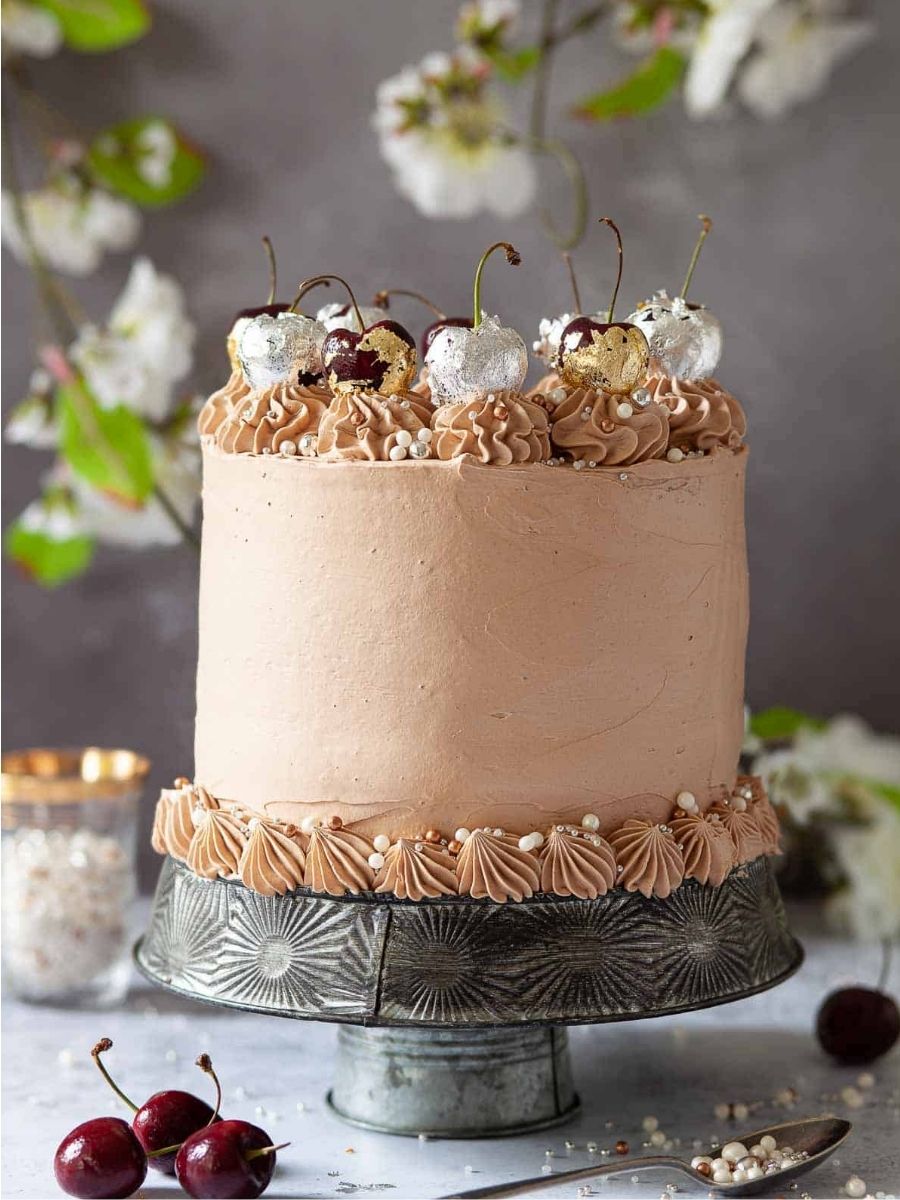
For a particularly impressive presentation, the top is decorated with ten cherries wrapped in edible silver or gold leaf, piped buttercream rosettes, and optional chocolate flakes and sprinkles.
Although this cake requires several preparation stages, each component contributes to its distinctive taste and appearance.
The homemade jam provides a fresh fruit element, while the Italian buttercream creates a luxurious, silky texture that complements the chocolate sponge beautifully.
Serve this sophisticated chocolate cherry layer cake as a celebration dessert, or make it the highlight of a special afternoon tea.
Its combination of chocolate richness, fruity brightness, and elegant decoration makes every slice feel like a special treat.

Chocolate Cherry Celebration Cake
Ingredients
Equipment
Method
- Prepare the Cherries: Set aside 10 cherries, preferably with their stalks intact, for decorating the finished cake. Remove the stones from the remaining cherries and cut them in half.
- Cook the Fruit: Place the prepared cherries in a saucepan with the caster sugar and lemon juice. Cook gently for approximately 15 minutes, stirring frequently, until the sugar dissolves and the fruit softens.
- Reach the Setting Point: Increase the heat and cook the jam until it reaches 105°C (221°F), checking with a digital food thermometer. For a firmer set, continue cooking until it reaches 110°C (230°F).
- Cool the Jam: Remove the saucepan from the heat and allow the jam to cool completely before assembling the cake.
- Prepare the Oven and Pans: Preheat the oven to 180°C (350°F/Gas Mark 4). Grease and line three 6-inch round cake pans with baking parchment.
- Cream the Butter and Sugar: Beat the room-temperature butter and caster sugar with electric beaters until the mixture becomes light, pale, and fluffy.
- Add the Egg Yolks: Separate the egg yolks from the whites. Beat the yolks into the creamed butter mixture, followed by the milk and vanilla extract, until well combined.
- Mix in the Dry Ingredients: Sift the plain flour, cocoa powder, baking powder, and espresso powder into the bowl. Mix until the dry ingredients are incorporated into the batter.
- Whip the Egg Whites: Clean the beaters thoroughly, then whisk the egg whites in a separate bowl until stiff peaks form.
- Fold the Egg Whites into the Batter: Mix one spoonful of whipped egg whites into the chocolate batter to loosen it. Gently fold in the remaining whites using a large metal spoon, taking care to retain as much air as possible. Continue until no white streaks remain.
- Fill the Cake Pans: Divide the batter evenly among the three prepared pans and gently smooth the surfaces.
- Bake the Sponge Layers: Bake for approximately 20 minutes, until the cakes have risen and spring back when lightly pressed. For a temperature check, insert a digital thermometer into the centre of each sponge; it should register 95–98°C (203–208°F).
- Dissolve the Sugar: Place three-quarters of the caster sugar (240 g) and all the water in a medium saucepan. Heat over medium-low heat until the sugar has completely dissolved.
- Whip the Egg Whites: Meanwhile, whisk the egg whites with the cream of tartar, lemon juice, or white wine vinegar until soft peaks form. Gradually add the remaining 80 g of caster sugar, one spoonful at a time, while beating until stiff peaks develop.
- Heat the Sugar Syrup: Increase the heat and cook the syrup until it reaches 115°C (240°F). Check the temperature using a digital food thermometer.
- Combine the Syrup and Meringue: With the mixer running, slowly drizzle the hot syrup into the whipped egg whites. Pour it down the inside of the bowl directly onto the meringue, avoiding the metal whisk to reduce the risk of hot syrup splattering.
- Cool the Meringue: Continue whipping until the meringue cools to lukewarm, approximately 25–28°C (77–82°F).
- Melt the Chocolate: Melt the dark chocolate and stir until smooth. Set aside while preparing the buttercream.
- Add the Butter and Vanilla: With the mixer running, add the room-temperature butter one chunk at a time. Add the vanilla extract and continue beating until the buttercream is smooth.
- Reserve the Vanilla Buttercream: Remove approximately one-quarter of the finished buttercream and set it aside for filling the cake layers.
- Prepare the Chocolate Buttercream: Beat one spoonful of the remaining buttercream into the melted chocolate until smooth. Add this mixture to the mixing bowl and beat until the chocolate is fully incorporated.
- Prepare the First Layer: Place one sponge layer upside down on a cake board or serving plate, with its flat side facing upwards. Pipe a tall border of chocolate buttercream around the edge to contain the filling.
- Fill the First Layer: Spread some of the reserved vanilla buttercream inside the border, then add some cooled cherry jam. If the jam contains excess syrup, drain the cherries before adding them to prevent liquid from escaping between the layers.
- Add the Second Layer: Place the second sponge on top of the filling. Repeat the process by piping a chocolate buttercream border, spreading vanilla buttercream inside, and adding cherry jam.
- Complete the Cake Stack: Position the final sponge layer on top, keeping the layers aligned.
- Cover the Cake: Use the remaining chocolate buttercream to cover the top and sides, spreading it evenly over the surface.
- Pipe the Rosettes: Pipe 10 buttercream rosettes around the top of the cake. Add smaller rosettes around the bottom edge for a decorative finish.
- Decorate the Cherries: Cover the 10 reserved cherries with edible silver and/or gold leaf. Place each cherry in the centre of a sheet of edible leaf and use the parchment backing to help wrap the delicate leaf around the fruit. Position one decorated cherry on each top rosette.
- Add the Finishing Touches: If desired, spoon chocolate flakes into the centre of the cake and scatter sprinkles around the edges to complete the decoration.
Notes
- Make the Cherry Jam Ahead: Prepare the homemade cherry jam in advance and store it in the refrigerator for up to one week. Let it cool completely before using it in the cake.
- Use Frozen Cherries if Needed: Frozen cherries can replace fresh cherries when they are unavailable.
- Control Excess Jam Syrup: Some cherries release more liquid than others. If the jam is particularly juicy, remove the cherries from the syrup before layering to prevent the filling from leaking out.
- Prepare the Cake Pans Properly: Always grease and line the three 6-inch cake pans, even if they are nonstick, to make removing the sponges easier.
- Bring the Butter to Room Temperature: Softened butter creams more easily with sugar and incorporates smoothly into the Italian buttercream.
- Fold Gently: Use a large metal spoon to fold the whipped egg whites into the chocolate batter. Gentle movements help preserve the air needed for a light sponge.
- Use a Stand Mixer: Italian buttercream requires extended whipping, so a stand mixer makes the process considerably easier than using a handheld electric beater.
- Temper the Chocolate Mixture: Mix a spoonful of buttercream into the melted chocolate before adding it to the remaining frosting. This helps reduce the risk of the chocolate seizing.
- Store Buttercream Carefully: Italian buttercream can be refrigerated for up to one week. Bring it back to room temperature and re-whip until smooth before using. It may appear separated initially, but continued beating should help restore its consistency.
- Check Temperatures Accurately: A digital food thermometer helps determine when the jam reaches its setting point, the sugar syrup reaches 115°C, and the sponge cakes are fully baked.
- Adjust for Larger Pans: For 8-inch cake pans, prepare 1½ times the jam, double the sponge cake ingredients, and make 1¾ times the buttercream. Reserve 15 cherries for decoration. The larger cakes may need longer to bake; begin checking them at around 25 minutes.
Chef’s Secret
The key to beautifully defined layers in this Chocolate Cherry Cake is controlling the moisture in the cherry filling.
Even when the jam has reached its setting point, some cherries may release extra syrup as the mixture cools.
Before assembling the cake, check the consistency and separate the fruit from any excess liquid if necessary.
Spread the vanilla buttercream inside the chocolate buttercream border, then distribute the cherries evenly without adding too much syrup.
This keeps the filling contained and helps prevent the sponge layers from becoming overly wet or sliding apart.
For the neatest finish, allow the jam to cool completely before using it.
The result is a more stable layer cake with distinct chocolate sponge, creamy buttercream, and bright cherry flavour in every slice.
Serving Suggestions
Serve Chocolate Cherry Cake in generous slices alongside freshly brewed coffee, espresso, or black tea to balance the richness of the chocolate buttercream.
For a special celebration, pair each slice with a few fresh cherries or a small serving of lightly sweetened whipped cream.
A spoonful of extra cherry jam on the side can reinforce the fruity filling, while a light scattering of chocolate shavings adds an elegant finishing touch.
For a dessert platter, serve smaller slices with fresh berries to provide a refreshing contrast to the rich cake.
If presenting the cake at a party, keep the silver- or gold-leaf cherries visible on top and cut the slices carefully to show off the contrasting layers of chocolate sponge, vanilla buttercream, and cherry jam.
Conclusion
This Chocolate Cherry Cake combines tender chocolate sponge, homemade cherry jam, and smooth Italian buttercream in a beautiful layered dessert.
Its rich cocoa flavour, fruity centre, and elegant cherry decorations make it a memorable choice for birthdays, anniversaries, holidays, and other special gatherings.
Although each component requires a little care, preparing them step by step makes the finished cake achievable at home.
Follow the temperature guidance, keep the cherry filling from becoming too wet, and finish with the decorative touches you love for a sophisticated cake that tastes as impressive as it looks.
