
BakeryDiary is a recipe curation and editorial platform. We research and curate recipes from public sources, considering ratings, reviews, comments, and feedback. We then refine and present them clearly for home cooks. We are committed to an ad-free, focused experience that makes discovering and preparing recipes easier.
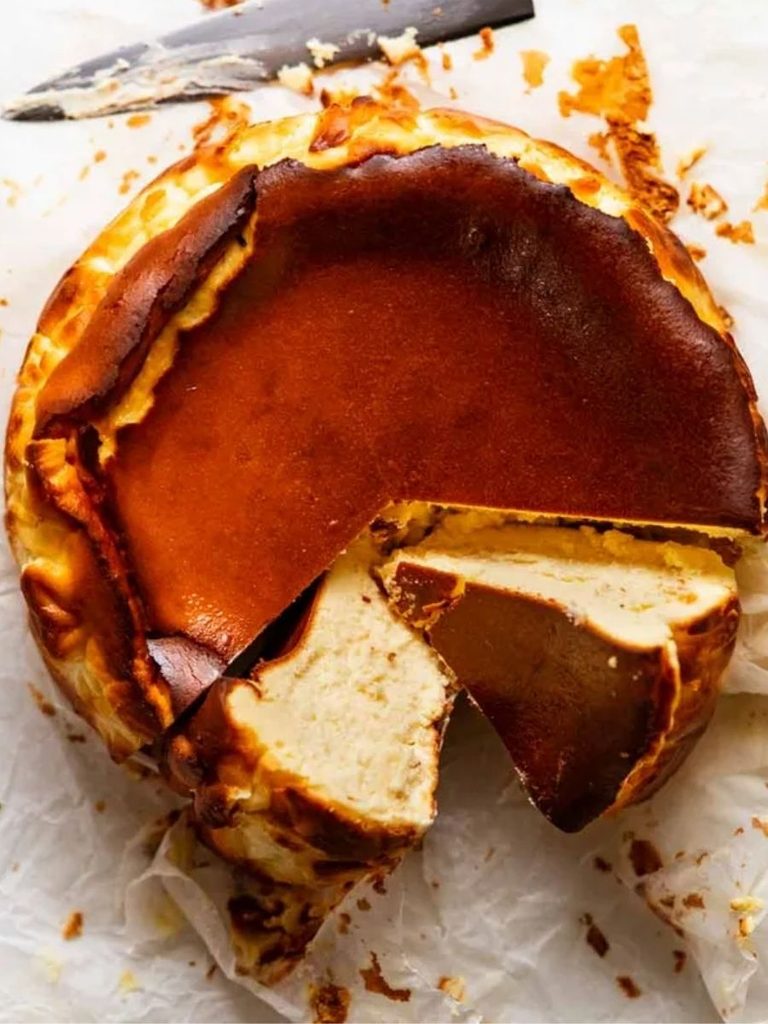
Few desserts create such a striking contrast as a classic Basque Cheesecake.
Its deeply golden, almost burnt-looking surface gives way to an exceptionally soft, creamy center, creating a dessert that feels both rustic and elegant.
Unlike traditional cheesecakes that depend on a biscuit crust and carefully pale edges, this Spanish-style favorite embraces an intentionally darkened top and naturally crinkled sides.
The high baking temperature encourages the surface to caramelize, bringing a distinctive toasted sweetness that pairs beautifully with the mellow richness of the cheesecake beneath.
The filling is built around simple ingredients, including full-fat cream cheese, caster sugar, whipping cream, flour, vanilla, and carefully measured eggs.
Together, they create a texture that is remarkably light and airy while remaining smooth and luscious.
Vanilla adds gentle warmth, while the caramelized exterior provides deeper flavor and a pleasant contrast to the delicate interior.
Preparation also focuses on technique rather than complicated ingredients.
The cream cheese is beaten until smooth, while the flour is carefully incorporated into part of the cream before the remaining cream and vanilla are added.
The eggs are mixed in gently to help limit excess air bubbles. Once baked, the cheesecake should have a richly browned surface while the center remains noticeably wobbly.
It rises dramatically in the oven before naturally sinking as it cools, creating the characteristic rustic appearance.
After cooling and an overnight chill, each slice becomes easier to cut while retaining its wonderfully creamy center.
Served simply on its parchment paper, this Basque Cheesecake needs little decoration to make an impression.
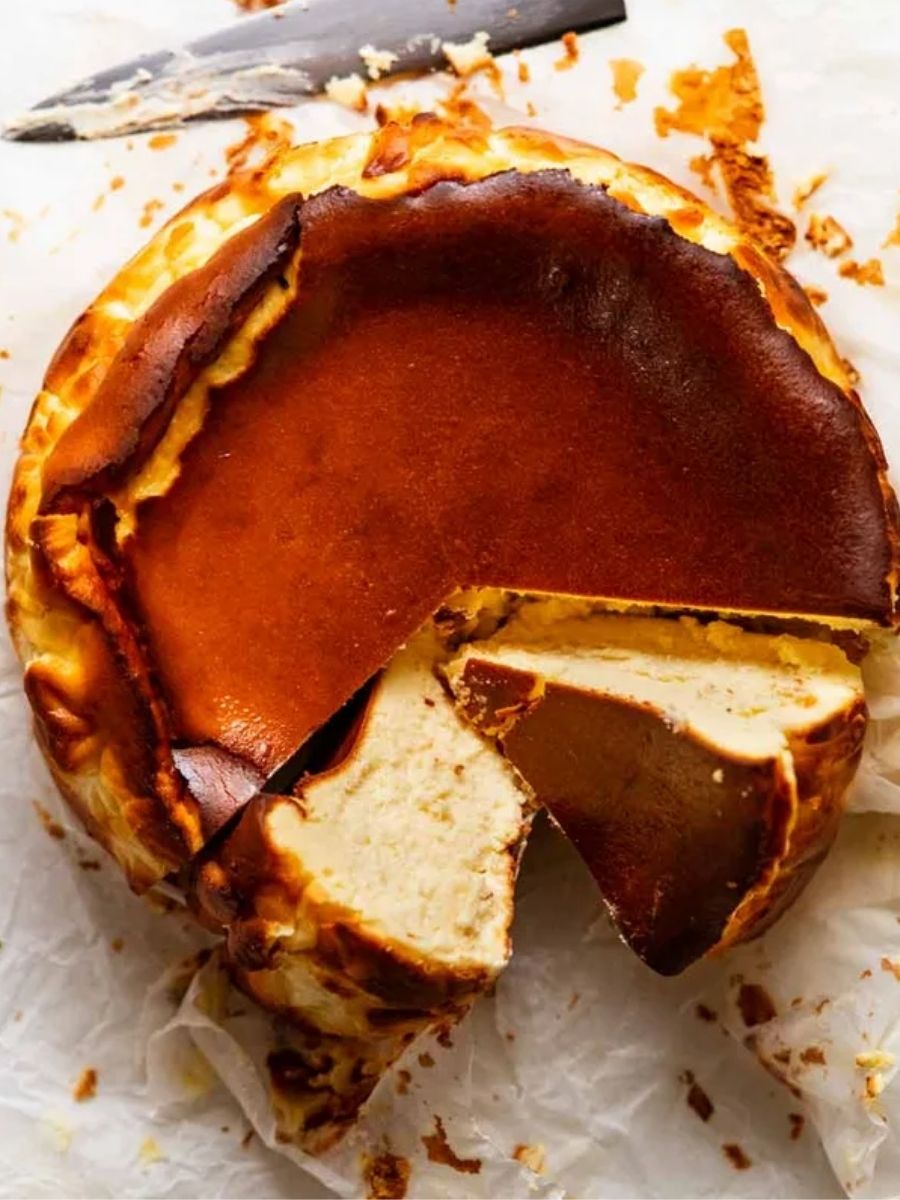

Burnt Basque Cheesecake Bliss
Ingredients
Equipment
Method
- Preheat the Oven: Preheat the oven to 220°C / 425°F (200°C fan) with the oven shelf positioned in the middle.
- Prepare the Pan: Scrunch two 40 cm / 16-inch sheets of baking/parchment paper and arrange them in an “X” inside a 20 cm / 8-inch springform pan that is about 6 cm / 2.5 inches tall. Press the paper into the corners and fold the excess over the rim. Do not grease the pan. The crumpled paper should remain rustic and pleated rather than perfectly smooth.
- Beat the Cream Cheese: Place the room-temperature cream cheese in a large mixing bowl and beat on medium speed for 2 minutes, scraping down the sides as needed, until completely smooth and free of lumps.
- Add the Sugar: Add the caster sugar to the cream cheese and beat on low speed for 10 seconds, just until incorporated.
- Make the Flour Paste: Place about one-quarter of the whipping cream in a separate medium bowl with all of the flour. Whisk by hand until the flour is completely incorporated and the mixture becomes a smooth, paste-like consistency.
- Finish the Cream Mixture: Slowly whisk the remaining whipping cream into the flour mixture. Once the flour is fully incorporated, whisk in the vanilla. The finished mixture should remain pourable rather than whipped.
- Combine the Cream Mixture: With the electric beater running on low speed, slowly pour the cream mixture into the cream cheese mixture. Beat only until the ingredients are combined.
- Add the Eggs: Keeping the beater on low speed, slowly pour in the lightly whisked eggs. Stop mixing as soon as the eggs are incorporated to minimize the formation of air bubbles.
- Fill the Pan: Pour the finished batter into the prepared springform pan.
- Remove Air Bubbles: Gently bang the filled pan against the counter so air bubbles rise to the surface. Use a small sharp knife to pop any visible bubbles. Repeat this process 3–5 times.
- Bake the Cheesecake: Bake for approximately 45 minutes, or until the surface becomes a deep golden brown. Depending on the oven, baking may take up to 65 minutes. Watch particularly closely during the final 15 minutes. The top should be deeply caramelized without becoming burnt, while the center should remain noticeably wobbly. The cheesecake will rise dramatically during baking, similar to a soufflé.
- Cool the Cheesecake: Leave the cheesecake in its pan on the counter for at least 2 hours. It will sink as it cools; this is normal.
- Chill Overnight: Refrigerate the cooled cheesecake uncovered for at least 8 hours, preferably overnight.
- Release the Cheesecake: Remove the sides of the springform pan. Use the excess parchment overhang to lift the cheesecake from the base onto a cutting board or serving plate, then fold the parchment sides down.
- Bring to Serving Temperature: If desired, allow the chilled cheesecake to stand at room temperature for 30 minutes before serving. It can also be served chilled.
- Slice and Serve: Cut the cheesecake into slices like a traditional cake and serve as it is. The creamy Basque cheesecake is designed to be enjoyed without additional cream, berries, or other toppings.
Notes
- Use full-fat cream cheese; low-fat cream cheese will not set properly.
- Choose whipping cream that is suitable for whipping, and avoid low-fat cream.
- Bring the cream out of the refrigerator about 15 minutes before using so it is slightly less chilled.
- Measure the lightly whisked eggs rather than relying only on the number of eggs, as egg sizes can vary.
- Do not grease the pan. The parchment paper should be heavily scrunched to create the characteristic rustic sides.
- When combining the flour with the cream, add only about one-quarter of the cream initially to prevent flour lumps.
- Keep the mixer on low speed when adding the cream mixture and eggs, and stop mixing as soon as everything is incorporated.
- Removing excess air bubbles helps prevent browned spots or lumps from appearing on the finished surface.
- Judge doneness primarily by the color of the cheesecake surface. Baking time can vary from about 45 to 65 minutes depending on the oven.
- The center should still wobble when the cheesecake comes out of the oven, and the cake will rise substantially before sinking as it cools.
- Refrigerate the cheesecake uncovered for at least 8 hours after cooling.
- Leftovers can be kept refrigerated for up to 5 days. The flavor becomes even better from the second day onward.
- This cheesecake is not suitable for freezing.
Chef’s Secret
The most important detail for achieving the signature Basque texture is to control the amount of air incorporated into the batter.
Once the cream cheese is smooth, keep the mixer on low speed when adding the cream mixture and especially when incorporating the eggs.
Stop mixing immediately once the eggs disappear into the batter.
Before baking, pour the mixture into the parchment-lined pan, firmly tap the pan against the counter, then use a small sharp knife to pop visible bubbles.
Repeating this process three to five times helps reduce larger pockets of trapped air.
This matters visually because bubbles can create browned lumps on the surface during baking.
The cheesecake will still be delicious if a few remain, but minimizing them gives the rustic, deeply caramelized top a cleaner appearance.
Serving Suggestions
This Basque Cheesecake is designed to be served simply, without requiring cream, berries, or other toppings.
For the intended presentation, release it from the springform pan, lift it using the parchment overhang, and fold the paper down around the sides before slicing.
If time permits, let the chilled cheesecake sit at room temperature for about 30 minutes before serving; it can also be enjoyed directly from the refrigerator.
Serve individual slices on their own so the contrast between the dark caramelized surface and creamy vanilla center remains the focus.
Conclusion
Basque Cheesecake is a wonderfully uncomplicated dessert in appearance but rewards careful attention to mixing, baking, cooling, and chilling.
Its deeply golden surface, rustic parchment-wrapped edges, and exceptionally creamy center create the distinctive character that makes this Spanish-style cheesecake so memorable.
Once fully chilled, it slices neatly while retaining its soft, luscious interior. Served simply, each piece delivers a balanced combination of caramelized richness and gentle vanilla creaminess.
With its dramatic appearance and straightforward ingredient list, this cheesecake makes an impressive dessert for both casual gatherings and special occasions
